Robust Theme
Dec 09, 2019 2020-04-08 7:40Robust Theme

Clinical Steps to Assess Peri-Implant Health
Having a system in place to assess implant health for every clinician in the practice will give the office the consistency needed to help not only treat implant issues but to prevent any problems in the future. Clinical and radiographic findings are both necessary to detect and evaluate the health of the implant. The evaluation of the soft tissue condition around the implant should begin with oral hygiene assessment in general focusing on the biofilm presence on not only the implants but the restorations.
Step 1
Dental implants should be visually evaluated and probed routinely and periodically (at least once per year) as part of comprehensive oral exams, similar to natural teeth;
Step 2
Pocket probing on dental implants should be conducted with a light force (approximately 0.15N); peri‐implant pocket depths should in general be ≤5 mm;
Step 3
Bleeding on probing should not occur at implant sites defined as being healthy. Bleeding on probing should be assessed carefully using light forces (0.15 N) to avoid possible effects of trauma caused by the process. It is difficult to differentiate between biofilm‐induced peri‐implant inflammation and mechanically induced trauma; bleeding “dots” should be interpreted carefully as this may represent bleeding due to tissue trauma and not bleeding associated with tissue inflammation
Step 4
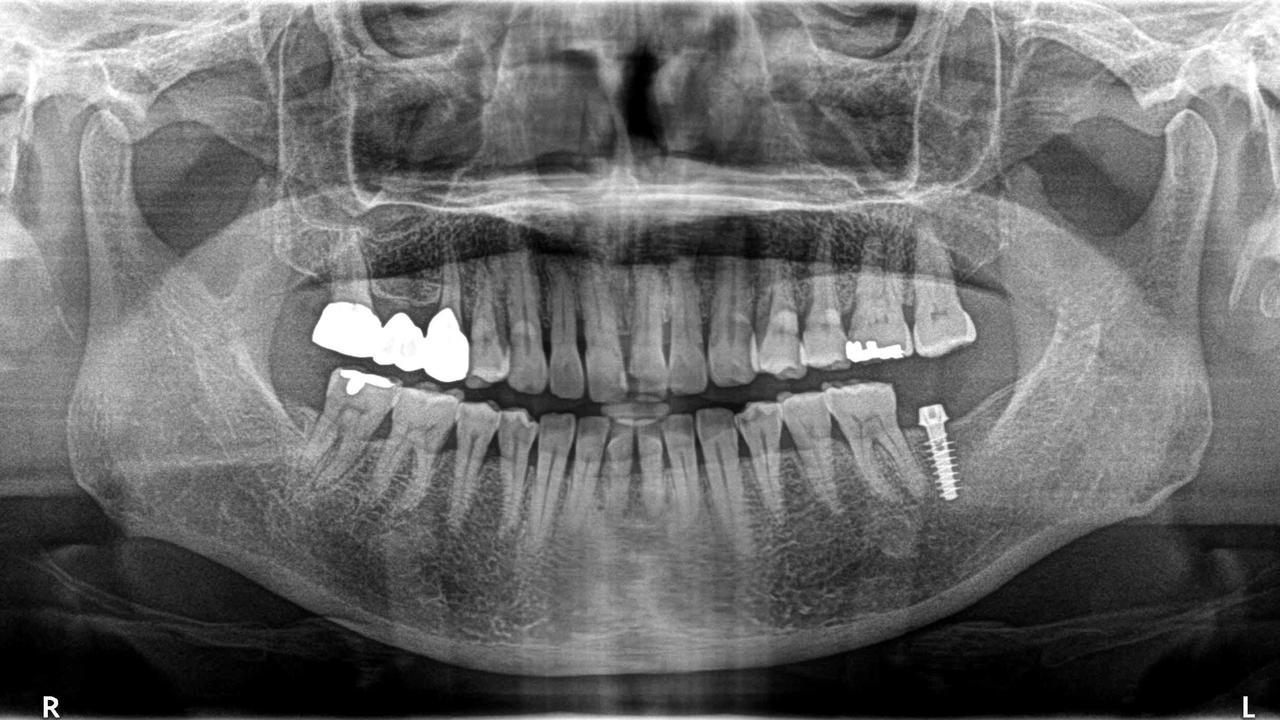
Intra‐oral radiographic evaluation of changes in bone levels around implants is necessary to discriminate between health and disease states. A prerequisite for the radiographic evaluation should be an image taken at baseline (post restoration) that clearly allows for identification of an implant reference point and distinct visualization of implant threads, for future reference Alveolar bone remodeling following the first year in function may be dependent on the type and position of the implant, but change (loss) of alveolar bone starting after the implant was placed in function should not exceed 2 mm. Changes ≥2 mm at any time point during or after the first year should be considered as pathologic.1
Susan Wingrove in 2013 created a textbook Peri-Implant Therapy for the Dental Hygienist, that is a treasure of information about implants. She designed an easy 5 step implant assessment system restated below. (You may purchase her book on amazon or read at the online library Wiley Press).
- Visually assess soft tissue recording any sign of inflammation or change to texture, color or contour. An implant should be surrounded by 2-3 mm of keratinized tissue.
- Probe and palpate for signs of peri-implant disease by using a flexible probe with 0.15 N of pressure. Palpate looking for bleeding and/or exudate by placing fingers buccally and lingually starting at the apex drawing upward and downward.
- Assess for calculus, cement or instrument particles by using woven floss or dental tape using a shoeshine movement looking for fraying floss or roughness to the implant.
- Assess for mobility, pain and occlusion by the visual analogue scale (VAS) recording at each visit and lay out the tools to evaluate occlusal trauma such as articulating paper.
- Assess bone level with yearly radiographs vertical and periapical being the best suited. Refer back to the film taken one-year post-restoration as a baseline.

1. Renvert, S, Persson, GR, Pirih, FQ, Camargo, PM. Peri‐implant health, peri‐implant mucositis, and peri‐implantitis: Case definitions and diagnostic considerations. J Clin Periodontol. 2018; 45( Suppl 20): S278– S285. https://doi.org/10.1111/jcpe.12956
Please also see our blog An Overview of AAP Peri-Implant Classifications
